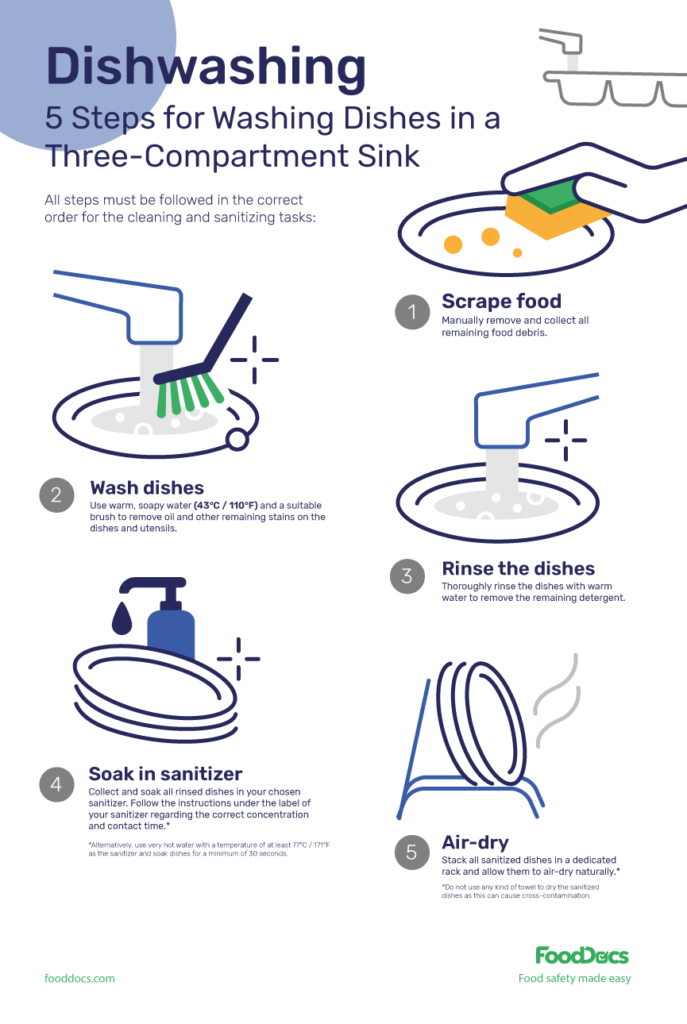
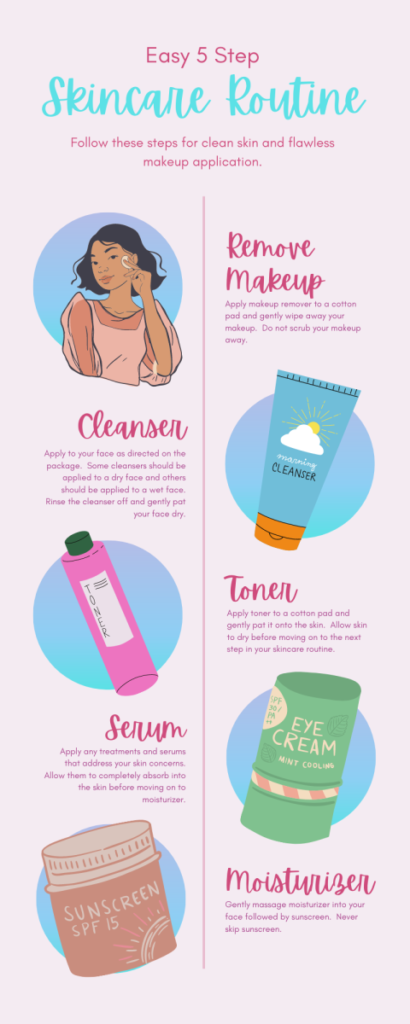
If you’ve ever found yourself wondering what the correct order of cleaning should be, fret no more! Cleaning can sometimes feel overwhelming, with so many different tasks and areas to tackle. But fear not, as this article aims to provide you with a simple and effective guide to help you navigate through your cleaning routine efficiently. Whether you’re a seasoned cleaning pro or just starting out, understanding the correct order of cleaning can make all the difference in achieving a spotless and organized space. So, let’s dive right in and discover the secrets to a successful cleaning regimen!
What Is The Correct Order Of Cleaning?
Cleaning can sometimes feel overwhelming, especially when faced with a messy and disorganized space. However, having a systematic approach and following the correct order of cleaning can make the task much more manageable and efficient. So, what is the correct order of cleaning? Let’s explore the importance of cleaning in the correct order, the cleaning supplies and equipment needed, and the step-by-step process to achieve a spotless and fresh living environment.

This image is property of i0.wp.com.
Importance of Cleaning in the Correct Order
Cleaning in the correct order is vital for several reasons. Firstly, it helps to maximize efficiency by minimizing wasted time and effort. By planning and organizing your cleaning tasks, you can streamline the process and avoid unnecessary duplication of efforts. Secondly, cleaning in the correct order ensures that you don’t inadvertently spread dirt, dust, or bacteria from one area to another. This is particularly important in spaces like kitchens and bathrooms, where cross-contamination can occur if proper order is not followed. Lastly, having a systematic approach to cleaning helps to maintain a clean and organized living space, which can positively impact your mental and physical well-being.
Cleaning Supplies and Equipment Needed
Before diving into the cleaning process, it is essential to gather all the necessary supplies and equipment. Having everything on hand will save you valuable time and prevent interruptions during the cleaning process. Some essential cleaning supplies include:
- Multi-purpose cleaner: An all-purpose cleaner is versatile and can be used on various surfaces, including countertops, tables, and appliances.
- Disinfectant: Using a disinfectant to wipe down frequently touched surfaces can help eliminate harmful bacteria and viruses.
- Microfiber cloths: These lint-free and non-abrasive cloths are effective in attracting and removing dust and dirt without leaving streaks or scratches.
- Vacuum cleaner or broom: Depending on the type of flooring, a vacuum cleaner or broom will be needed to remove loose dirt, debris, and pet hair.
- Mop: A mop, along with a suitable floor cleaner, is essential for thoroughly cleaning hard floors.
- Window cleaner: Use a streak-free window cleaner and a squeegee or microfiber cloth to achieve sparkling clean windows and glass surfaces.
- Gloves, sponges, and scrub brushes: These items will aid in tackling tougher stains, grime, and hard-to-reach areas.
Preparing the Cleaning Area
Before embarking on your cleaning journey, it’s essential to prepare the area you’ll be cleaning. This includes decluttering and organizing personal items, removing any obstacles or furniture that might hinder your progress, and ensuring the room is well-ventilated. Open windows and turn on fans to facilitate airflow, allowing any cleaning products to dry properly. Also, consider turning off or covering electronics and moving delicate or breakable items to a safe location to avoid accidental damage.
Step 1: Clearing Clutter
The first step in the correct order of cleaning is to clear clutter. Begin by organizing and putting away any loose items, such as toys, clothes, or household items that may be lying around. Find a designated spot for each item or consider decluttering and donating belongings that are no longer needed. Clearing clutter not only creates a visually pleasing space but also allows for easier and more thorough cleaning of surfaces.

This image is property of www.simplyspotless.com.au.
Step 2: Dusting
Once the clutter is out of the way, it’s time to tackle the dust. Start from the top and work your way down, as gravity tends to pull dust and debris downward. Dust ceiling fans, light fixtures, and high shelves using a microfiber cloth or an extendable duster. Clean off dust from horizontal surfaces such as countertops, tables, and shelves using the same cloth. Don’t forget to dust electronics, picture frames, and other decorative items.
Step 3: Vacuuming or Sweeping
Next, focus on removing loose dirt, crumbs, and debris from the floors. If you have carpets or rugs, vacuum them thoroughly, paying special attention to high-traffic areas. Use attachments or crevice tools to reach corners and edges. For hard floors, sweep or use a vacuum with a hard floor setting to remove loose dirt before moving on to the next step.

This image is property of www.lifesavvy.com.
Step 4: Wiping and Disinfecting Surfaces
Now that the dust and loose dirt are taken care of, it’s time to wipe down surfaces and disinfect as necessary. Start with countertops, tables, and other frequently touched surfaces. Use an all-purpose cleaner or disinfectant spray to thoroughly clean these areas. Pay attention to detail, ensuring you get into corners, edges, and crevices where dirt and bacteria may accumulate. Remember to follow the instructions on the cleaning products and let them sit for the recommended amount of time to effectively kill germs.
Step 5: Cleaning Floors
With the surfaces cleaned, it’s time to tackle the floors. For carpets or rugs, consider using a carpet cleaner or spot treatment for any stains or spills. If possible, move furniture to access hard-to-reach areas. For hard floors, use a suitable floor cleaner and mop. Work your way from one side of the room to the other, ensuring thorough coverage. Pay attention to corners, baseboards, and any grout lines or textured surfaces that may require extra attention.

This image is property of 5845715.fs1.hubspotusercontent-na1.net.
Step 6: Cleaning Windows and Glass
Windows and glass surfaces can quickly accumulate smudges, fingerprints, and dirt. To achieve streak-free results, use a high-quality window cleaner and a lint-free cloth or squeegee. Start from the top and work your way down, using horizontal or vertical strokes. Take extra care with delicate or small windows and consider using a step ladder or extension pole for higher or hard-to-reach areas.
Step 7: Cleaning Fixtures and Appliances
Moving on to fixtures and appliances, take some time to clean and shine them. Wipe down faucets, sinks, and showerheads with an appropriate cleaner or vinegar solution to remove any built-up grime or mineral deposits. Clean the inside and outside of appliances such as stovetops, ovens, refrigerators, and microwaves. Use designated cleaners or homemade solutions, following the manufacturer’s instructions, to ensure safe and effective cleaning.

This image is property of images.saymedia-content.com.
Step 8: Emptying Trash and Recycling
As you near the end of your cleaning routine, don’t forget to empty the trash and recycling bins. Properly dispose of waste and recycling materials according to local guidelines. Consider using trash liner bags to prevent leaks and odors. Wipe down the inside of trash cans to eliminate any lingering smells or bacteria.
Step 9: Final Touches
The final step involves adding those extra touches that make your space feel fresh and inviting. Consider lighting scented candles, using air fresheners, or placing potpourri to add a pleasant fragrance to the room. Arrange decorative items, replace fresh flowers, and fluff cushions or pillows to create an aesthetically pleasing atmosphere.
Common Mistakes to Avoid
While cleaning in the correct order is crucial, there are also some common mistakes to avoid. One of the most common mistakes is neglecting to clean in a top-to-bottom fashion, which can result in dust and dirt settling on clean surfaces. Another mistake is using the wrong cleaning products for specific surfaces, which can cause damage or leave residue. It’s essential to read labels, follow instructions, and use appropriate tools and materials for each cleaning task. Lastly, rushing through the cleaning process can lead to incomplete or inefficient cleaning. Take your time, be thorough, and pay attention to detail to achieve the best results.
Benefits of Cleaning in the Correct Order
Cleaning in the correct order offers numerous benefits beyond just a tidy living environment. It can help reduce allergens, such as dust mites and pet dander, improving indoor air quality and reducing allergy symptoms. Following a systematic cleaning routine also saves time and effort by eliminating the need to backtrack or repeat tasks. Moreover, maintaining a clean and organized space can enhance productivity, reduce stress, and provide a sense of calm and relaxation.
In conclusion, knowing the correct order of cleaning is essential for achieving an efficient and thorough cleaning routine. By following a systematic approach, gathering the necessary supplies, and being attentive to detail, you can transform your living space into a spotless and refreshing haven. So, roll up your sleeves, put on some cheerful music, and enjoy the satisfaction of cleaning your way to a cleaner and happier home!

